About 48% of all compressor failures come down to one thing: the dry gas seal. I’ve seen it happen countless times—a seal fails, the compressor goes down, and suddenly you’re dealing with emergency repairs and lost production time.
The good news? Most of these failures are preventable. You just need a systematic maintenance approach that catches problems before they become disasters.

Pre-Maintenance Preparation
Safety First: What You Must Know
Before you touch anything, you depressurize the system completely. I mean completely. Verify your pressure gauges read zero, then verify them again.
Follow lockout/tagout procedures every time—no exceptions. The last thing you want is someone accidentally starting the compressor while you’re working on the seal. Wear appropriate PPE: safety glasses, nitrile gloves, and possibly a face shield if you’re working with high-pressure lines.
Have your MSDS sheets for barrier gas and any bearing oils on hand. Know what you’re dealing with before you start.
Tools and Materials You’ll Need
You don’t need much, but what you do need matters. Get a quality pressure gauge (accurate to ±0.5 psi), a reliable thermometer, and a flow meter if your system has flow transmitters.
For inspection, grab a bright flashlight and magnifying glass. You’re looking for subtle signs of damage—scratches on seal faces, hairline cracks in O-rings, discoloration from heat. A marker helps you identify observation points for future inspections.
Stock replacement O-rings and seal face kits according to your manufacturer’s recommendations. Use only OEM-approved materials—cheap substitutes fail fast.
Most importantly, use clean, dry nitrogen. Contaminated nitrogen ruins seals. If you’re not sure your nitrogen source is clean, have it tested. It’s the cheapest insurance you can buy.
Daily and Weekly Inspection Checklist
These checks take 10-20 minutes and catch most developing problems early.
Step 1: Monitor Pressure and Flow
Every single day, check your barrier gas pressure. It should sit at least 25 PSIG (1.7 BARG) above your seal chamber pressure. Why? This differential prevents process gas from sneaking past the barrier seal and contaminating the primary seal faces.
Write down the number. I mean actually write it down. You’re building a trend line, and that’s your best early warning system.
Also check the secondary vent pressure. This tells you what’s happening downstream of the seal. Abnormal readings here signal problems developing inside the seal chamber.
Look at your flow transmitter if you have one. You’re looking for consistency. A sudden drop in flow is a red flag—it might mean a clogged filter or a failing booster pump.
Step 2: Monitor Temperature
Take a temperature reading at the seal location. Record it alongside your pressure reading. Most dry gas seals operate safely under 500°F, though your specific equipment might have different limits—check your nameplate.
Watch for temperature spikes. If you go from 120°F to 150°F suddenly, something’s wrong. More commonly, you’ll see a gradual temperature creep—2-3°F per week. That’s your seal faces making contact and generating friction. That’s a warning sign.
Compare your current reading to what’s normal for your equipment. If you don’t know the baseline, establish one today. Every seal has a normal operating temperature, and you need to know it.
Step 3: Visual Inspection of Support System
Walk around your seal support system. Look for leaks at every connection point—threads, flanges, hose connections. A small drip today becomes a bigger problem tomorrow.
Check your filter’s pressure drop gauge. A fresh filter reads 1-5 psi differential. When it climbs above 10 psi, your filter is working too hard and restricting flow. That’s your cue to replace it.
Inspect the drain lines. Are they clear? Is liquid accumulating? Condensation in your barrier gas system means your dew point is too high—your gas isn’t dry enough. Oil in the drain means your barrier seal is leaking, which points to degraded O-rings.
Listen. Does everything sound normal? Unusual chirping, grinding, or squealing signals trouble. Trust your ears.
Step 4: Check Nitrogen Supply
Verify your nitrogen source is operational and delivering pressure at the main inlet. If you have a booster pump, confirm it’s running smoothly without noise or vibration.
Check that filter elements aren’t blocked. This sounds obvious, but a partially clogged filter upstream can starve your seal system of gas. Small pressure drops are normal over time. Large drops mean something needs attention.
Listen to your nitrogen supply system. A healthy system has a consistent background hum. Unusual noise is always worth investigating.
Monthly Detailed Inspection Checklist
Once a month, take 45-60 minutes for a deeper dive.
Step 1: Drain Inspection
This is critical. Take a sample from your secondary vent drain—the lowest point in your venting system.
A small amount of oil is normal. I’m talking a few drops. It shows your barrier seal is doing its job, shedding a tiny bit of oil that migrated from the bearing cavity.
Large amounts—like an ounce or more per week—means your barrier seal is failing. The O-rings inside are degraded, and oil is leaking past them into your secondary vent line. That’s not a future problem. That’s a present problem that needs a planned O-ring replacement.
Look for liquid water or condensate. If you see droplets, your barrier gas has moisture in it. That’s a dew point violation. Your filtration system or your nitrogen source isn’t clean enough.
Step 2: Filtration System Assessment
Check that filter pressure drop gauge again. Compare it to last month’s reading.
A steady rise in differential pressure is normal—filters get dirtier over time. But if you went from 5 psi to 12 psi in two weeks, something’s introducing more contamination than usual. Maybe the nitrogen source quality dropped. Maybe there’s a leak somewhere upstream introducing dust.
Look at the filter housing itself. Any cracks? Loose bolts? Corrosion? A housing that’s starting to corrode can eventually leak, bypassing your filtration entirely.
Write down the filter change date. Plan the next replacement based on your differential pressure trend. If you’re seeing 10 psi already, don’t wait for the manufacturer’s recommended interval. Replace it now.
Step 3: Pressure and Temperature Trending
Grab your logbook and look back at the last three months of readings.
Is pressure stable, rising, or falling? Even a gradual 1 psi per month decline signals a leak developing somewhere. Calculate the trend: (newest reading – oldest reading) ÷ months elapsed = psi per month.
Do the same for temperature. Is it stable, rising gradually, or jumping around? Rising temperature indicates seal face contact and friction. That’s your seal degrading in real time.
Cross-reference these trends. If pressure is dropping AND temperature is rising simultaneously, your seal is almost certainly in contact. That combination is a death sentence if not addressed.
Pressure stable but temperature rising? That suggests increased friction without loss of lift. Check your gas purity—contamination increases friction.
Step 4: Gas Supply Quality Check
Look at your nitrogen supply line. Is it clean? Discolored? Any visible contamination?
Check all your connectors and fittings. Loose connections let contaminated air get sucked in. Make sure all isolation valves are fully open—a partially closed valve creates backpressure.
If you have a booster pump, listen to it. Is it running at normal speed? A slowing pump might indicate it’s failing or that downstream pressure is too high.
Quarterly and Semi-Annual Maintenance
These inspections take 2-3 hours and require you to really dig into the system.
Step 1: Gas Conditioning Unit Inspection
Your gas conditioning unit (GCU) has four main components: coalescing filters, separator filters, heaters, and boosters. Every quarter, inspect all of them.
Pop the access panels on your filters. Look inside. Are they loaded with dirt? Coalescing filters should be yellow or white. If they’re dark brown or black, they’re saturated. The separator filters should look relatively clean. If you see dark lines or water droplets, you’ve got a moisture problem.
Check your heater output temperature. It should match your setpoint—usually around 100-120°F. A heater that’s running cold isn’t doing its job. A heater that’s running hot might be overworking, which signals high load.
Confirm your booster pump delivers the pressure you need. This is where your barrier pressure comes from. A failing booster won’t maintain adequate pressure, even if your source pressure is correct.
Look at your cooler radiator. Run your hand along the fins. Debris blocks airflow and causes high discharge temperature. Clean it off if needed.
Action item: Replace filters if the differential pressure exceeds 10 psi. Don’t wait for them to get worse.
Step 2: Secondary Seal System Check
Look at the area where your barrier seal connects to the compressor. Is there oil weeping from the connection? A little is fine. A steady drip means something’s wrong.
Check the O-rings around the mounting interface. They should look smooth and flexible, with a slight shine from residual oil. If they look hardened, cracked, or dull, they’re degrading. This is especially important on seals that see high temperatures.
Look for any visible damage or discoloration on the seal housing. Heavy discoloration from heat suggests the seal has been running hot, possibly in contact.
Document your observations. Take photos if you see concerning damage patterns.
Step 3: Compressor-Seal Interface
Inspect the area where your seal connects to the compressor. Look for oil leaking from the bearing cavity through the labyrinth seal.
A small amount is normal. Heavy oil leakage means the bearing chamber is flooded, which usually indicates a problem with the bearing itself or inadequate chamber venting.
Check the labyrinth seal components. Are they intact? Any visible damage? If pieces have come loose, they could damage your dry gas seal when they make contact.
Verify that all mounting bolts are tight. Uneven bolt tension causes misalignment, which generates high temperature and accelerates wear. Use even pressure when tightening—think of it like seating a tire bead evenly.
Confirm all O-rings around the mounting interface are in place and not pinched or twisted. A misaligned O-ring can leak slowly, allowing contamination inside.
Step 4: Documentation and Trend Analysis
Enter every reading into your maintenance system. If you’re not using a computerized system, a simple spreadsheet works fine.
Create a simple chart showing pressure over time. Draw a trendline through your data points. Is it flat, rising, or falling? That line tells you everything about your seal’s health.
Do the same for temperature. Compare the slope of the temperature line to the slope of the pressure line. Are they moving in opposite directions? That’s bad. Pressure falling, temperature rising? Your seal is dying.
Flag any readings outside your normal operating range. Set alarm thresholds: if pressure drops below X or temperature exceeds Y, someone gets notified immediately.
Use this data to schedule your annual overhaul and O-ring replacement. Don’t schedule based on calendar dates. Schedule based on actual condition.
Annual Overhaul and Deep Inspection
Once a year, plan a full shutdown for a comprehensive inspection. This takes 4-6 hours depending on your equipment.
Step 1: Complete System Pressure Test
After depressurizing completely and following lockout/tagout, perform a pressure test on your barrier gas system.
Pressurize to 1.5 times your normal operating pressure. Monitor the pressure gauge for 30 minutes. You’re looking for any leakage.
Normal behavior: pressure stays constant or drops imperceptibly—less than 0.1 psi over 30 minutes.
Any faster drop is a leak. If you lose more than 0.5 CFM equivalent over 30 minutes, you’ve got a significant leak somewhere. Find it.
Document the result with date, time, and pressure values. Photograph your gauge before and after.
Step 2: Gas Purity and Dew Point Analysis
Pull a gas sample from your barrier gas supply and send it to a lab for analysis. You’re checking for water content and hydrocarbon contamination.
Your dew point must be below -40°C. Anything warmer is too wet. Your nitrogen purity should be 99.99% or better. Anything lower contains too many impurities.
If your analysis shows problems, upgrade your filtration immediately. A contaminated barrier gas supply is the single biggest reason seals fail. It’s worth fixing.
Compare this year’s results to last year’s. Any degradation? If your nitrogen source is getting dirtier, you need to escalate maintenance on your supply system or switch suppliers.
Step 3: Seal Face Inspection
This requires opening the seal. Follow your manufacturer’s procedures for safe disassembly.
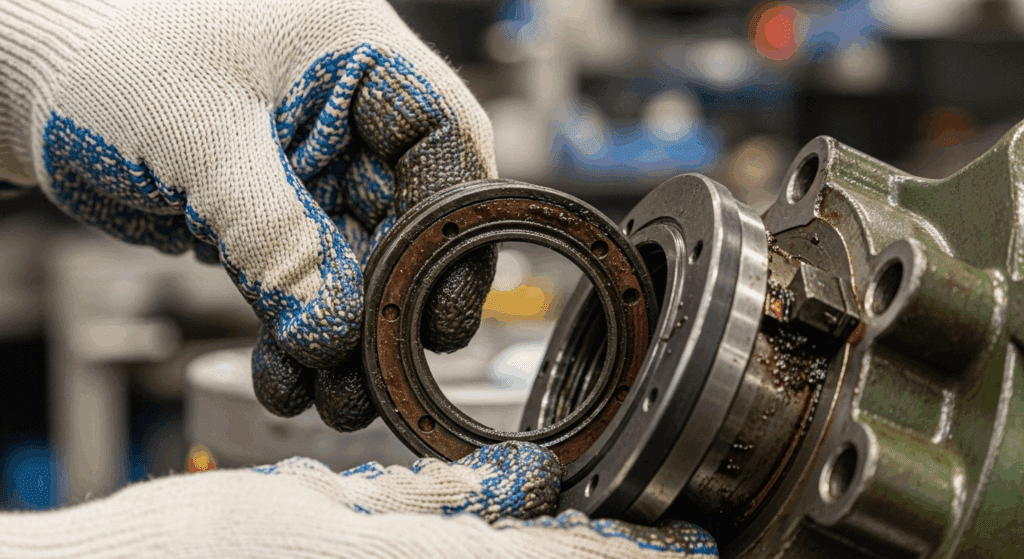
Visually inspect the primary ring and mating ring faces. Look for scratches, pitting, blistering, or any other damage pattern.
Scratches indicate abrasive particles contacted the faces during operation—that’s contamination getting through. Pitting indicates corrosion from moisture. Blistering means something really bad happened—probably explosive decompression or rapid contact.
Measure the face flatness with a precision straightedge. Faces should be flat to within 2 micrometers. Anything worse needs replacement.
Check for metal transfer patterns. If you see a shiny area on one ring paired with a worn area on the other, the faces were in contact and rubbing. That’s an emergency indicator.
Take photographs. Damage patterns tell stories. Store these photos with your maintenance records.
Step 4: O-Ring and Secondary Seal Replacement
Replace O-rings every 3-5 years regardless of condition. You can’t tell if an O-ring is failing just by looking—the degradation happens from the inside out.
When you replace them, test the old ones. Compress each O-ring between your fingers. Does it snap back? Does it feel brittle or rock-hard? If it’s degraded, you just confirmed you needed to replace it.
Install new O-rings using only OEM-approved materials. The wrong elastomer compound will fail in your specific gas and temperature environment.
Keep replacement O-rings in stock. When you need them, you need them now. Having them on hand prevents emergency ordering and rush shipping.
Conclusion
This checklist works. I’ve seen it prevent failures in dozens of facilities. The key is consistency. Every day, every month, every year—stick to your schedule. Your seals will reward you with reliability.
Start today with your first daily inspection. Get your baseline numbers. Then stay disciplined. This is how you build a dry gas seal system that doesn’t fail.


