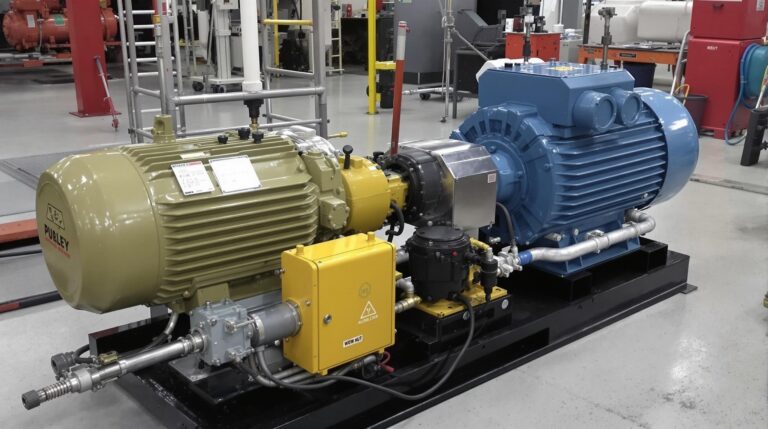
A single bore reading on a worn pump is all it takes to order the wrong seal. I pulled a brand-new mechanical seal off a feed pump last year — leaked from hour one — because the technician took one caliper measurement across the bore and called it done. The bore was egg-shaped from eight years of packing gland pressure, and that single reading missed 0.18 mm of ovality. Double the downtime, double the seal cost, and a lesson that could have been avoided with five extra minutes of measuring.
Stuffing box measurement is not a simple caliper exercise. Field conditions — worn bores, corroded surfaces, limited access — turn it into a judgment call. And the measurement set you need depends on whether you are ordering packing or converting to a mechanical seal. Get the procedure right, and you order once. Rush it, and you will be back on the phone with your supplier before the pump cools down.
Tools and Precision Requirements
Bore diameter and shaft outside diameter (OD) demand 0.01 mm resolution — an outside micrometer for the shaft, an inside micrometer or bore gauge for the bore. A vernier or digital caliper with +/-0.02 mm accuracy handles depth and flush port measurements. A depth micrometer or wire-and-rule method works for chamber depth, though the micrometer is preferred.
Before you start, make sure your instruments are zeroed and calibrated. A worn caliper that reads 0.05 mm low will put you into the wrong packing size every time.
Here is what each measurement requires:
- Shaft/sleeve OD: Outside micrometer (+/-0.01 mm)
- Bore ID: Inside micrometer or telescoping gauge transferred to outside micrometer (+/-0.01 mm)
- Chamber depth: Depth micrometer or wire/rule (+/-0.5 mm acceptable)
- Flush ports, bolt circle: Caliper (+/-0.02 mm)
If a caliper is your only field option, take extra readings and average them. Never substitute a tape measure or steel rule for bore and shaft measurements. That is where ordering mistakes start.
A dial indicator for runout is worth bringing if you are considering a seal conversion. Runout determines whether a new seal survives more than a few weeks.
How to Measure the Stuffing Box Bore
The bore inside diameter (ID) is the single most important measurement for ordering. It sets the seal seat OD or determines packing cross-section together with the shaft diameter. One reading is not enough.
The Six-Point Bore Verification Method
Take your inside micrometer or bore gauge and measure at three axial depths — near the face, at mid-depth, and near the bottom of the chamber. At each depth, take two perpendicular readings. That gives you six measurements total: three positions, two axes each.
Why six? A pump that has run with packing for years develops bore wear. Gland pressure pushes the packing against the bore wall unevenly, and over time the bore goes oval. A single measurement at the face might read 76.10 mm while the mid-depth perpendicular reading shows 76.28 mm. If you ordered a seal based on that first reading alone, the O-ring seat would never sit concentrically.
Record all six readings. The spread between the highest and lowest number tells you the bore condition.
Reading the Results — Bore Condition Tiers
Compare your maximum and minimum bore diameter readings:
- Within 0.1 mm, smooth surface: Acceptable. Order based on the average diameter.
- 0.1 to 0.15 mm spread, some roughness: Marginal. The bore can accept a mechanical seal with an O-ring-mounted seat, but monitor for early leak signs. Note the ovality on your order form so your seal supplier knows.
- Greater than 0.15 mm spread or deep scoring: Requires honing or re-machining before any seal will function. Do not order until the bore is corrected.
- Greater than 0.5 mm oversized from nominal: The casing needs replacement or bore sleeving. An O-ring will not seat in a bore this far out of spec.
The most common mistake I see is treating bore measurement as a one-and-done caliper swipe. If the pump has ever run packing, six points is non-negotiable. Every reorder I have traced back to bore measurement came from a single-point reading on a worn bore.
How to Measure Shaft or Sleeve Diameter
Use an outside micrometer for shaft or sleeve OD. Measure at two axial positions — under where the packing or seal rides, and 25 mm inboard — and take perpendicular readings at each position. Four readings total, same logic as the bore: you are checking for taper and ovality.
If the pump uses a shaft sleeve, measure the sleeve OD, not the bare shaft underneath. The sleeve is the sealing surface.
Check the surface while you have the micrometer in hand. For packing applications, the shaft surface needs to be between 16 and 32 microinches Ra — smooth to the touch, no axial grooves, no pitting. Run your fingernail across it. If you catch a groove, the packing will track that scratch and leak along it.
Shaft or sleeve wear exceeding 0.8 mm (1/32 inch) means the surface is past its service limit. Stop measuring and plan for sleeve replacement or shaft repair. No packing or seal will perform on a shaft that far gone.
When measuring for a mechanical seal, shaft OD accuracy is especially critical — the seal’s drive mechanism and secondary sealing element must match the shaft diameter within tight tolerances.
How to Measure Stuffing Box Depth
Depth is where most ordering errors happen on seal replacements. The number you record depends on which reference point you measure to — and using the wrong one means the seal either bottoms out or fails to load properly.
Depth to Shaft Shoulder vs Depth to Back Wall
Two reference points exist inside the stuffing box:
- Depth to shaft shoulder (or step): The usable depth for a mechanical seal. The seal seat rests against this shoulder. Measure from the stuffing box face (gland mounting surface) to the shaft shoulder.
- Depth to back wall: The total chamber depth. Relevant for packing — you need the full cavity length to calculate how many rings fit.
I have seen technicians measure to the back wall, order a seal based on that number, and find out at installation that the usable depth was 8 mm shorter because of the shaft shoulder. The seal gland bottomed out before the spring could compress the faces. Either the seal over-compressed — overheating the elastomers and burning out within days — or the faces never closed at all.
Take three circumferential depth readings at different clock positions. If they vary by more than 0.5 mm, the stuffing box face may be cocked or damaged and needs facing before installation.
Always record both depth numbers: shoulder depth and total depth. Your seal or packing supplier can use either one depending on what they need.
Which Measurements You Need for a Mechanical Seal
You are measuring the stuffing box to specify a mechanical seal, so capture the full set in one pass. The bore, shaft, and depth fix the seal seat OD, the gland fit, and the usable chamber depth — getting them right the first time is what keeps you from ordering the wrong seal twice.
Seal Conversion Measurement Set
Converting from packing to a mechanical seal adds five more measurements beyond the basic four:
- Bolt circle diameter (center-to-center of gland studs)
- Gland bolt size and count
- Flush port location and diameter (if present)
- Depth to shaft shoulder (usable seal chamber depth)
- Shaft runout (TIR with dial indicator)
Bolt circle is critical for gland plate fit and often overlooked entirely. Without it, your seal gland may not physically mount.
If you are evaluating a packing-to-seal retrofit, capture every dimension on both lists — you may need the packing data for fallback if the conversion is not feasible. Cartridge mechanical seals simplify this process because they arrive pre-assembled and pre-set, reducing the chance that a measurement gap causes a fitment problem on site.
3 Measurement Mistakes That Lead to Wrong Parts
These three errors generate more reorders and repeat site visits than everything else combined.
Mistake 1: Single-point bore reading on a worn pump. One caliper swipe at the bore face tells you the diameter at that one spot. It does not tell you the bore is 0.2 mm wider at mid-depth, or oval by 0.15 mm on the perpendicular axis. Every pump that has run packing develops bore wear. Six readings, every time.
Mistake 2: Measuring depth to the wrong reference. Depth to the back wall gives you total chamber length. Depth to the shaft shoulder gives you usable seal depth. These are different numbers — often by 5 to 10 mm — and ordering a seal based on the wrong one means it either bottoms out or fails to load. Record both, label both clearly.
Mistake 3: Skipping bolt circle for seal conversions. Packing replacements do not need bolt circle because the existing gland fits back on. Seal conversions do — the new seal gland has to mount on those studs. I have seen technicians take perfect bore, shaft, and depth measurements, then make a second trip because nobody recorded the bolt pattern. It takes 30 seconds with a caliper.
If you skip this step, you will be back in a week with the right parts and a maintenance manager who has lost patience.
Your Field Measurement Checklist
Every measurement above fits on a single sheet you can carry to the pump.
Always (packing or seal):
- Bore ID: six readings (3 axial x 2 perpendicular), note max/min spread
- Shaft/sleeve OD: four readings (2 axial x 2 perpendicular)
- Depth to back wall
- Calculated packing width: (Bore ID – Shaft OD) / 2
Add for seal conversion:
- Depth to shaft shoulder
- Bolt circle diameter
- Gland bolt size and number
- Flush port diameter and location
- Shaft runout (TIR)
Fill in every field before leaving the pump. Walking back for one missed dimension costs more time than the entire measurement procedure. Match your numbers against the standard size tables above, and order with confidence that the parts will fit the first time.