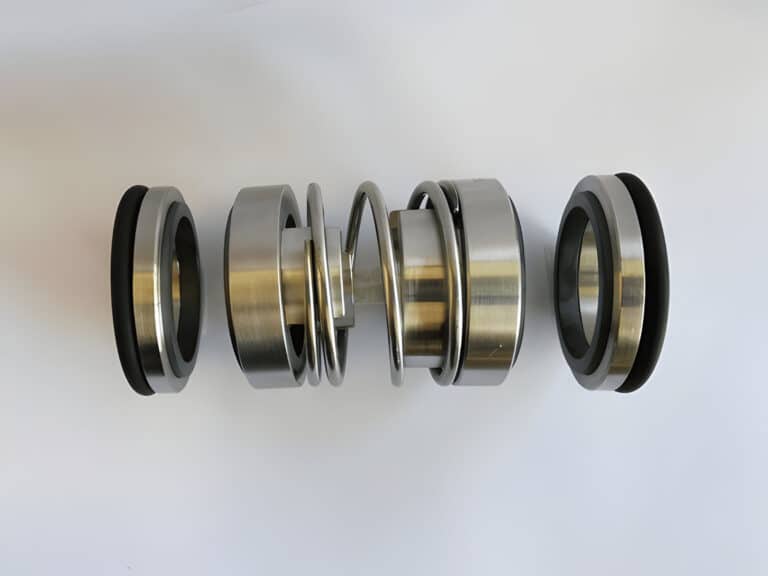
A lift-truck operator faced a $400,000 motor replacement because the seal’s original maker no longer existed. Freudenberg reverse-engineered the part from photos and a spec sheet, and a batch of 30 seals cost $4,231.
When a pump’s OEM seal is discontinued, matching or reverse-engineering a replacement is often the gap between a few thousand dollars and scrapping the machine.
Discontinued seals are routine, not rare — industry estimates suggest most industrial plants run equipment well over 20 years old. The work splits into four buyer-side steps: gather what’s left of the old seal, measure it correctly, submit a package to a vendor, and verify fit before it goes back in.
Get the first two right, and the rest usually follows.
Step 1 — Gather What Remains of the Original Seal
Gather everything that survived the failure before you scrap the pump — the old seal, its markings, and the paperwork around it. Together these tell a shop far more than any one of them alone.
Keep the reference package small but complete:
- The removed seal itself, even burned, chipped, or half-destroyed — the primary reference part
- Any legible part number, casting mark, or laser etch
- The pump manual and nameplate, for model and service context
A worn-off part number doesn’t end the search. The seal’s spring configuration, face materials, and rough dimensions still give a shop most of what it needs to start.
Whether the pump is a Grundfos, a Flygt, or an unbranded legacy unit, that same short list starts the search. If a marking is still readable, standard mechanical seal identification may still land an off-the-shelf match — this reverse-engineering path is the fallback once that dead-ends.
You’ll also need to pull the old seal without scoring the shaft, because a gouged shaft surface corrupts the very dimensions the vendor measures from.
Here’s the decision most people skip: work out why the original failed before you ask anyone to copy it. Reinstalling an identical design of a seal that already failed just reproduces the failure on a longer lead time.
If the original ran hot, leaked early, or wore a groove in months, tell the vendor — a material or face change may serve better than an exact clone.
Step 2 — Measure the Obsolete Seal and Document Its Dimensions
Six measurements define a replaceable seal, each taken with a specific tool. Get them on paper before you contact anyone, because they decide whether a match fits or comes back for rework.
| Dimension | Measure with |
|---|---|
| Shaft or sleeve diameter | Micrometer or caliper |
| Seal chamber bore | Inside caliper or bore gauge |
| Axial length (face width) | Caliper |
| Gland depth | Depth gauge |
| Stuffing-box-to-bearing distance | Depth gauge or rule |
| Shaft runout and end play | Dial indicator |
Here’s a trick that saves a rework cycle: take each diameter at several points around and along the shaft, not one. A single reading hides taper and wear, and the vendor builds to whatever number you send.

Where the old seal face or elastomer is visibly worn, don’t trust the worn part for its as-manufactured size. Cross-check against an intact reference surface — the housing bore, or the shaft OD where nothing rides — so a groove worn over five years doesn’t become the spec for the new seal.
Step 3 — Submit the Seal to a Vendor for Reverse Engineering
Your submission package has three parts, and geometry alone is only half of it:
- The physical sample or seal remnant — the primary reference part
- Your dimension sheet from Step 2
- Operating conditions: fluid, temperature, pressure, and shaft speed
From there the process leaves your hands. A CMM or laser scanner captures the part’s geometry, a material analysis identifies the original compound, and a CAD model feeds a prototype before anyone commits to a batch.

A CMM scan resolves dimensions to roughly 0.004 inch (0.1 mm) — tight enough to reproduce a face-flatness spec from a physical sample.
Custom machined seals built through reverse engineering can recreate a discontinued design from nothing more than a worn sample and a drawing. Send your measurements and sample, and the seal can be matched or rebuilt even when the original maker is gone.
The most common mistake I see at this stage is shipping the sample alone with no operating data. A vendor can copy geometry off a worn part, but without the fluid and temperature it can’t judge whether the original material was ever right for the duty.
Set expectations on time. A full reverse-engineering job runs in weeks, not days — an 11-week turnaround on a pump built in 1958 is a realistic shape, because prototyping and testing can’t be rushed.
If you’re formalizing the engagement, spell out acceptance criteria and lead time in a seal repair service contract — it protects both sides when the first article arrives.
Step 4 — Verify the New Seal’s Fit Before Installation
When the replacement arrives, measure it against your own dimension sheet before it goes anywhere near the pump. Check the critical fits first — shaft or sleeve bore, chamber OD, axial length — against the numbers you submitted, not the worn original.
Then, before you seat it, put a dial indicator on the shaft and confirm runout is within limits. A bent or worn shaft will kill a perfect seal as fast as a bad one, and it’s the one variable a good match can’t fix.

Dry-fit the seal in the chamber to confirm it seats square and the gland pulls down evenly. Skip this, and you’ll be back in a week pulling a seal that never had a chance.
Next Steps
Start today by pulling the old seal out intact and writing down why it failed — that single decision shapes everything the vendor does next.
A worn sample, six careful measurements, and honest operating data get you a seal that fits the first time. A sample tossed in a box gets you a rework cycle and another month of downtime.
The scanning and CAD modeling are the vendor’s job. The measurement discipline is yours — and it’s the half of this process that decides whether the replacement outlasts the one it replaced.