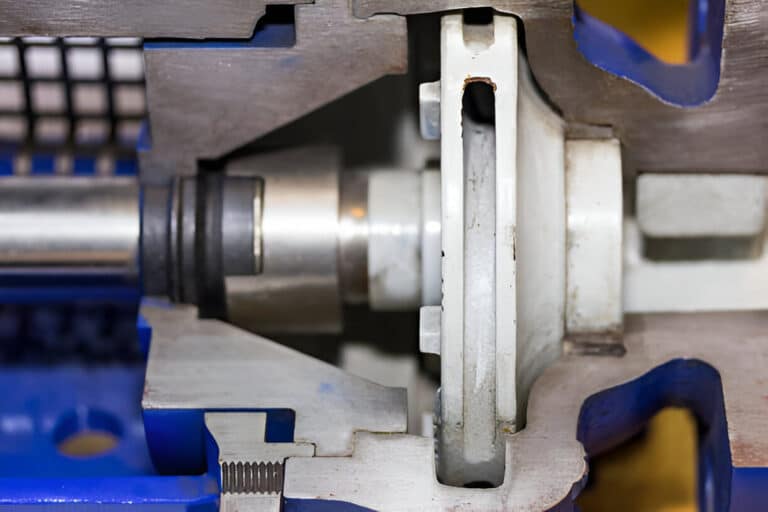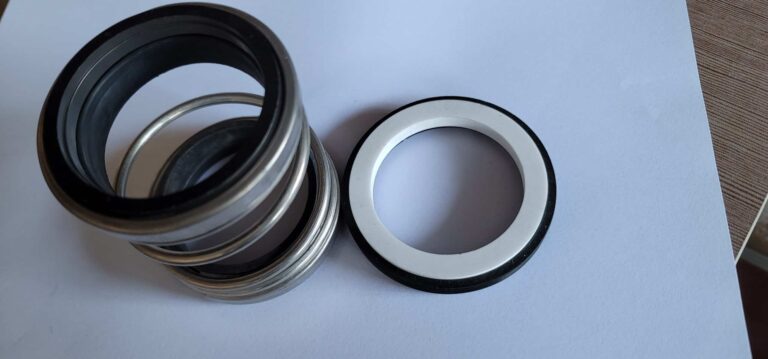
Most technicians who ask “what compression should I set?” are actually asking three different questions at once. Picking the wrong number for the wrong surface is why seals still leak after a textbook-perfect install.
The 20–30% you read on MarcoRubber is O-ring cross-section squeeze. The 50–70% you read on Lepuseal is spring compression ratio. Neither is the face compression distance a pump manufacturer specifies in millimeters on the seal print.
I’ve seen this failure pattern dozens of times — compression distance dialed in to spec, closing force never verified, seal leaking inside a week. Below: the formula, three percentages labeled by surface, a 45 mm shaft worked example, and the accept/reject numbers that decide start-up or teardown.
The Three Compressions You’re Actually Measuring
Mechanical seal compression is three numbers, each on a different surface, each with its own formula and accept/reject range.
- Face compression distance (δ) — a linear dimension in millimeters. The amount the spring is compressed from free length to installed length. This is what the seal print tells you. Typical range: 2.5–3.8 mm (0.100–0.150 inch).
- Spring compression ratio — δ expressed as a percentage of the spring’s free length. Commonly quoted values: 50–70% for single-spring seals, around 90% for multi-spring disc arrangements. Same physical event as δ, different dimensional reference.
- O-ring squeeze — percentage of the O-ring’s cross-section that gets compressed by the gland depth. The formula: `(cross-section − gland depth) / cross-section`. For a pump seal’s secondary O-ring in face-seal geometry, 20–30% squeeze; for static applications, 18–25%.
Every source quotes a percentage without saying which surface it applies to. Label the surface before you commit to a number.
Stage 1: Measure Your Setting Dimensions
You need three measurements before any calculation begins: the spring’s free length (from the seal print or measured off the shelf), the target installed length (from the seal print), and the actual installed length on the pump shaft.
Subtract installed from free and you have δ, the compression distance. If your pump has a setting plate or clip from the manufacturer, it locates the seal at the correct compression — that is the whole point of the clip.
Get this step wrong and every downstream number is wrong. Shaft, sleeve, and seal-chamber measurement technique is covered in measure mechanical seals; the physical workflow for dialing in δ on the pump is in mechanical seal setting compression.
Stage 2: From Compression Distance to Closing Force
A 3 mm compression distance tells you nothing about whether the faces are loaded correctly. Spring rate converts distance to force, and the full closing force equation has four terms, not one.
Per the Eagle Burgmann lexicon:
FSchl = FH + FF ± FR − FSp
- FH — hydraulic force: sealed pressure × balance ratio × face area
- FF — spring force: spring rate k × compression distance δ (× z for multi-spring designs)
- FR — secondary-seal friction (textbooks call it zero; field reality disagrees)
- FSp — sealing gap force from the thin fluid film
FF is the only term the installer directly controls; the rest is fixed by operating conditions and seal geometry. Spring rate and working length behind FF are broken down in calculating spring load for a mechanical seal; the hydraulic side sets FH against the opening force of a mechanical seal to determine whether closing force wins at operating pressure.
Worked example. A 45 mm shaft single-spring Type 1 seal, free length Lfree = 25 mm, spec working length Linstalled = 22 mm, spring rate k = 15 N/mm.
- δ = 25 − 22 = 3 mm
- FF = 15 × 3 = 45 N spring closing force
- Face area for a 45 mm shaft seal ≈ 460 mm²
- Net face-loading from spring alone: 45 / 460 ≈ 0.1 N/mm² (≈14 psi) before hydraulic pressure
At 5 bar sealed pressure with a 0.75 balance ratio, FH adds ~170 N, pushing total closing force to ~215 N and net face load to ~0.47 N/mm² (~68 psi). That is what you verify against — not the 3 mm.
Stage 3: Spring Compression Ratio
The 50–70% quoted for single-spring seals and the ~90% for multi-spring disc arrangements are both δ divided by free length — the same compression event expressed as a ratio instead of a millimeter. In the worked example, δ/Lfree = 3/25 = 12% — far below 50–70%, yet the spring sits at the print’s working length, so the print, not a generic ratio, decides whether it is set correctly.
The multi-spring 90% figure is misleading in isolation. It refers to total compression of the disc stack against the stack’s free-length spec, not any single spring element. Apply it to a single-coil design and you will set far more force than the seal was engineered for.
Always pull the free-length value from the manufacturer’s spec sheet for your exact seal. The percentage is only meaningful against that specific reference dimension.
Stage 4: O-Ring Squeeze Percentage
The O-ring squeeze formula is the simplest of the three:
Squeeze % = (cross-section − gland depth) / cross-section
| O-Ring Application | Squeeze % |
|---|---|
| Face seal (static, axial) | 20–30% |
| Static male/female (radial) | 18–25% |
| Reciprocating | 10–20% |
| Rotary | 0–10% |
For a pump seal’s secondary O-ring (sealing between rotating face holder and shaft sleeve), target 18–25% if radial or 20–30% if axial. Add 0–5% stretch on installation, no more.
Over-squeezed elastomers take a compression set and leak once thermal cycling pumps the gap; under-squeezed O-rings never seal. Do not set your spring to 20–30% of free length because a search result said “face seals 20–30%” — that number is about elastomer cross-sections, not the carbon-vs-ceramic interface.
Stage 5: Verify Against Accept/Reject Thresholds
Compression distance is a setting dimension. Face load is the performance number that predicts seal life — and it should land in a band, not on a point.
| Verification Metric | Accept Range | Reject Below / Above |
|---|---|---|
| Compression distance δ | 2.5–3.8 mm (typical) | Below free-length spec tolerance |
| Spring compression ratio (single-spring) | Ratio the print’s working length gives (12% in the worked example) | Working length outside print tolerance |
| O-ring squeeze (static/face) | 18–30% | < 15% or > 35% |
| Face load (new carbon) | ~30 psi (0.2 N/mm²) | Below 20 psi |
| Face load (worn carbon, end-of-life) | ~10 psi (0.07 N/mm²) | Below 7 psi |
| Operating specific pressure | 3–6 kg/cm² (43–85 psi) | Outside range = balance ratio error |
The 30 psi new / 10 psi worn framing — attributed to McNally Institute rules of thumb — is the clearest way to think about face loading. A seal reading 10 psi has no wear margin and fails early; one reading 15 psi is already past mid-life before the pump runs a shift.
Verify face load, not just δ. Face load also drives heat generated by the seal faces, the downstream failure mechanism when compression drifts high.
Common Mistakes That Pass the Compression Check
Compression distance can be dead on spec and the seal can still fail. Three patterns I see repeatedly on service call-backs:
Tightening the gland bolts to stop a leak. Sara Peters at Crane Engineering documented this paradox in 2017. Technicians respond to a weeping seal by torquing the gland further, which distorts the stationary face and makes the leak worse. The counter-intuitive field rule: loosen before tightening.
Ignoring the FR deposit case. Textbooks treat secondary-seal friction as zero. In the field, after 18–24 months on dirty fluid, deposits build up around the O-ring groove and FR grows. Push it high enough and FSchl goes negative — the seal opens on day 600 despite a textbook install on day one.
Setting the spring to free length. Someone reads “compression distance” as the installed length from gland face to seal face and sets the spring uncompressed. At start-up, before FH develops, the faces separate and the seal never wets.
The Oceaneering reliability study on 40 North Sea production pumps listed the same cause among its 12 findings: variance in the seal installation methods used by the offshore maintenance team. Which is the argument for running the formula instead of trusting feel.
Where the application allows it, cartridge seals pre-set compression at the factory — no calipers, no spring-rate math, no judgement call on the floor. Most failure modes above disappear because the measurement step does.
Your Go/No-Go Checklist
Three numbers decide whether the seal starts the pump or goes back to the bench.
- δ falls inside the manufacturer’s compression-distance tolerance (typically 2.5–3.8 mm for standard pump seals).
- Spring ratio δ/Lfree matches the ratio the print’s working length gives (12% in the worked example) — against the free length on the spec sheet, not a generic 50–70% number.
- Face load from FF + FH divided by face area sits between 20 and 85 psi, with a wear margin that keeps it above 10 psi at end-of-life.
Miss any one and the install fails — even if the other two read green. One number is a setting dimension, one is a ratio, one is the performance outcome. Verify all three independently before the pump breaks loose.