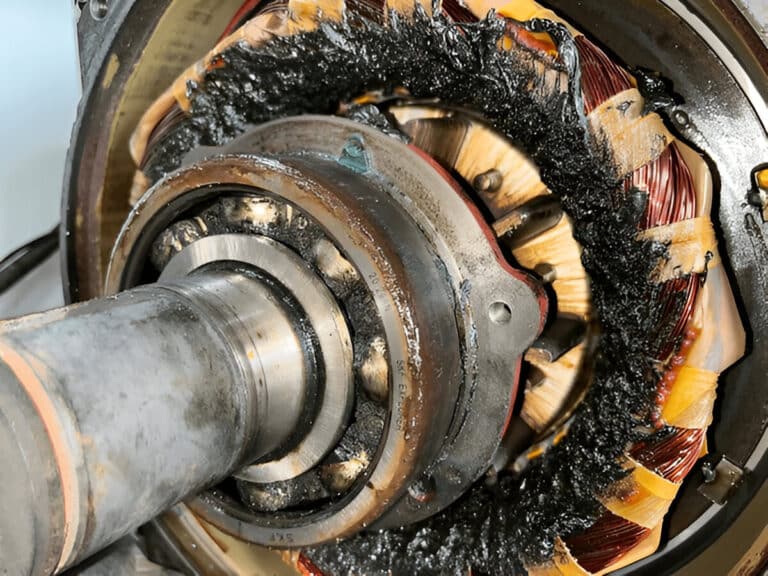
One in five mechanical seal failures traces back to installation, not the seal itself. I’ve pulled seals at three months that should have lasted three years — and every time, the equipment told the story before the seal did. A worn shaft, a cocked bore, a fingerprint on a lapped face. The seal was fine. The installation killed it.
The difference between a seal that holds and one that weeps on startup comes down to tolerance values, go/no-go criteria, and specific measurements at each stage. Those are the numbers you need before bolting the gland.
A component seal on a horizontal centrifugal pump is the baseline case. Cartridge seals, vertical pumps, and split seals each change enough of the sequence to need their own walkthrough.
Pre-Installation Inspection
Before you touch the new seal, measure the equipment it’s going onto. A seal installed on a worn pump fails regardless of technique — six equipment parameters determine whether the seal has a chance.
Shaft Runout and Radial Movement
Mount a dial indicator on the shaft near the seal chamber and rotate slowly by hand. Shaft runout should not exceed 0.002″ total indicated runout (TIR) for ball or roller bearings at 1000-3600 RPM. If the needle moves beyond that, you have a bent shaft or damaged bearing — stop and address it before proceeding.

Radial shaft movement — the shaft’s perpendicular play inside the bearing — has different limits by bearing type. Ball and roller bearings allow 0.002-0.004″ of movement. Sleeve and journal bearings allow 0.004-0.006″. Anything beyond those values means the bearing is worn, and the seal faces will see uneven loading from day one.
If you skip this step, the seal faces won’t track evenly. I’ve seen technicians install a perfect seal on a shaft with 0.005″ runout and wonder why it leaked in two weeks. The shaft was wobbling the rotating face off the stationary seat every revolution.
Bore Concentricity and Chamber Squareness
Concentricity of the shaft to the seal chamber bore should fall within 0.001″ per inch of shaft diameter, with a maximum of 0.005″ TIR. Measure this with a dial indicator on the bore ID while rotating the shaft.
Chamber squareness — the perpendicular relationship between the chamber face and the shaft centerline — should be approximately 0.0005″ per inch of bore diameter. Angular misalignment here prevents uniform contact across the seal faces, creating a leak path on one side before the other side even touches.
When either measurement is out of spec, the pump needs machine work before a new seal goes in. Installing the seal anyway is throwing money at a problem you haven’t fixed.
Surface Finish Requirements
The actual surface finish specification depends on the type of seal movement at that location:
- Static surfaces (no relative movement between seal and shaft): 45 rms maximum
- Dynamic surfaces (shaft sleeve under a pusher seal): 32 rms maximum
- Surfaces with axial movement (bellows seals, for example): 16 rms preferred
Run your fingernail across the shaft sleeve. If you can feel any scratch, nick, or burr, the O-ring will follow that groove as a leak path. The shaft surface under dynamic O-rings needs a mirror finish — not polished to look pretty, but polished to seal.
Before you remove the old seal, mark the shaft at the old seal position and inspect it for fretting, corrosion, or wear grooves. This saves you from discovering a damaged shaft after you’ve already contaminated the new seal faces.
Component Seal Installation
Component seals — the type you assemble piece by piece on the pump — require precise measurement at every step. The stationary seat goes into the bore first, then the rotary unit slides onto the shaft, and setting height determines compression.
Setting the Stationary Seat
Clean the bore with a lint-free cloth and a solvent that’s compatible with the seal elastomers. Inspect the bore for pitting, scoring, or corrosion. Badly pitted bores often need to be bored out and sleeved before a new stationary seat will seal properly.
Lubricate the stationary seat O-ring with the manufacturer-specified lubricant only. This is not optional. Petroleum-based lubricants destroy EPDM O-rings — the elastomer swells, loses memory, and the seat walks out of the bore under pressure. I’ve seen technicians grab whatever grease is on the bench. Two seals later, they call for help.
Press the seat squarely into the bore using even hand pressure or a clean, slightly smaller deep socket as a driver. Never use a hammer directly on the seal face. Never use a ferrous metal pusher — a chip of carbon or a scratch on the lapped face from a steel driver renders the seal useless before the pump even starts. Use the cardboard protector that ships with the seal as a buffer between the driver and the face.
Sliding the Rotary Unit and Setting Height
Lubricate the shaft sleeve and the rotary unit O-rings. Slide the rotary assembly onto the shaft carefully, watching for any point where the O-ring must pass over keyways, snap-ring grooves, or cross-holes. These edges will cut the O-ring if you force it. Cover sharp transitions with a thin sleeve of shim stock or tape before sliding.
Setting the correct compression is the single most critical measurement in component seal installation. The manufacturer’s drawing specifies a setting dimension — typically measured from a reference face on the gland to the seal face. Get this wrong by even 1/16″, and the seal either runs with insufficient face load (leaks immediately) or excessive compression (generates heat, accelerates wear, fails in weeks).
Measure with calipers, not by eye. Mark the shaft at the correct setting position before tightening the set screws. Rotate the shaft by hand after setting — it should turn with slight resistance from the spring load but no binding or scraping.
Cartridge Seal Installation
Cartridge seals arrive pre-assembled and pre-set on a sleeve, which eliminates the setting height measurement that causes most component seal installation errors. For facilities running multiple pump sizes, cartridge designs cut installation time roughly in half and remove the most common source of compression errors.
The sequence diverges from the component procedure above at three points. The assembly slides on complete, the gland is fully torqued before anything is released, and the shipping set tabs come off last.
Reverse those last two and the spring pushes the rotary face forward before the assembly is constrained, which throws away the factory-set compression. The full cartridge installation sequence covers each step.
Gland Bolt Torque
Tighten gland bolts in a star pattern: snug each bolt finger-tight first, then apply a quarter-turn in alternating sequence. The goal is uniform compression on the gland gasket. Over-tightening — even on one bolt — distorts the gland and cocks the stationary seat. Two-bolt glands are especially prone to this because uneven torque has nowhere to average out.
Whichever type you fitted, rotate the shaft by hand before going further. It should spin freely with slight spring resistance. If it binds or catches, the seal is cocked — loosen the gland, reseat, and start the bolt sequence again.
Installation Mistakes That Cause Premature Failure
Three installation errors account for the majority of the callbacks I’ve handled.
Over-Tightening the Gland
When a seal leaks at startup, the instinct is to tighten the gland bolts. This is backwards. Over-tightening distorts the gland plate, which shifts the stationary seat out of square with the shaft. The seal faces, which were lapped flat to within one micron, now contact at an angle. The leak gets worse.
The counterintuitive fix: loosen the gland bolts first. Back them off, let the gland reseat naturally, then re-tighten in the star pattern to the snug-plus-quarter-turn spec. I’ve watched technicians solve a persistent leak in thirty seconds by loosening before tightening.
Wrong Lubricant on Elastomers
At Spurlock Station, East Kentucky Power Cooperative lost a lower mechanical seal because the maintenance crew used the wrong lubricant during installation. The petroleum-based grease caused the elastomer to harden, which locked the rotary face onto the shaft. The seal couldn’t flex, couldn’t track, and failed.
This isn’t a rare edge case. Any petroleum-based product on an EPDM O-ring will swell it. Silicone lubricant on certain fluoroelastomers causes the same problem. The only safe practice: use the lubricant that ships with the seal or the exact product specified on the manufacturer’s drawing. If the tube is missing, call the manufacturer before grabbing a substitute.
Skipping the Vent
At the same Spurlock Station facility, the upper seal failed from air entrapment. The seal chamber lacked vent ports, so air pockets sat against the seal faces during operation. Without liquid film between the faces, they ran dry and burned.
Every vertical installation and many horizontal ones need venting before startup. If the seal housing doesn’t have vent ports, you need to add them or ensure the piping plan provides a path for trapped air to escape. Missing this step means the seal runs dry from the first revolution — and seal faces burn within seconds without lubrication.
Startup and Verification
The seal is installed. Before you start the pump, two things must happen — and they must happen in order.
Priming and Venting
Fill the seal chamber with the process fluid or barrier/buffer fluid before any shaft rotation under power. Open all vent connections and let fluid displace trapped air completely. For flush plans, verify the flush supply is flowing: minimum 15 psi above stuffing box pressure, with 5-8 gallons per hour for balanced seals. Position any seal pots within 3-5 feet of the seal, at least one foot above the seal centerline.
An Oceaneering reliability study across 40 pumps on a North Sea platform found incomplete venting during startups was one of the root causes of persistent seal failures across the facility. The crews were starting pumps before confirming full liquid coverage at the seal faces.
Initial Leak Assessment
Start the pump and watch the seal area for the first several minutes. A slight weep during the first few rotations is normal — the faces are lapping in. Steady dripping that doesn’t slow within the first hour indicates a problem.
If you see a persistent leak, don’t immediately tighten the gland. Check the flush pressure and flow first. Then check the gland bolt torque for uniformity. If the leak persists, shut down and pull the seal — a leak that doesn’t seat in the first hour won’t seat in a week, and running it just damages the faces further.
Before You Button It Up
The pre-installation inspection is the step most technicians skip and the one that prevents the most failures. Every tolerance value in this guide exists because a seal failed when someone ignored it — 0.002″ of runout, 0.001″ of concentricity, 32 rms of surface finish. These aren’t textbook numbers. They’re the boundaries between a seal that lasts and one that comes back.
Twenty-five years of leak-free installations comes down to three words: lube, square, and clean. Get the right lubricant on every elastomer, get every face square to the shaft, and keep every lapped surface clean enough that you’d put your gloves back on before touching it. Do those three things at every step, and the seal takes care of itself.